
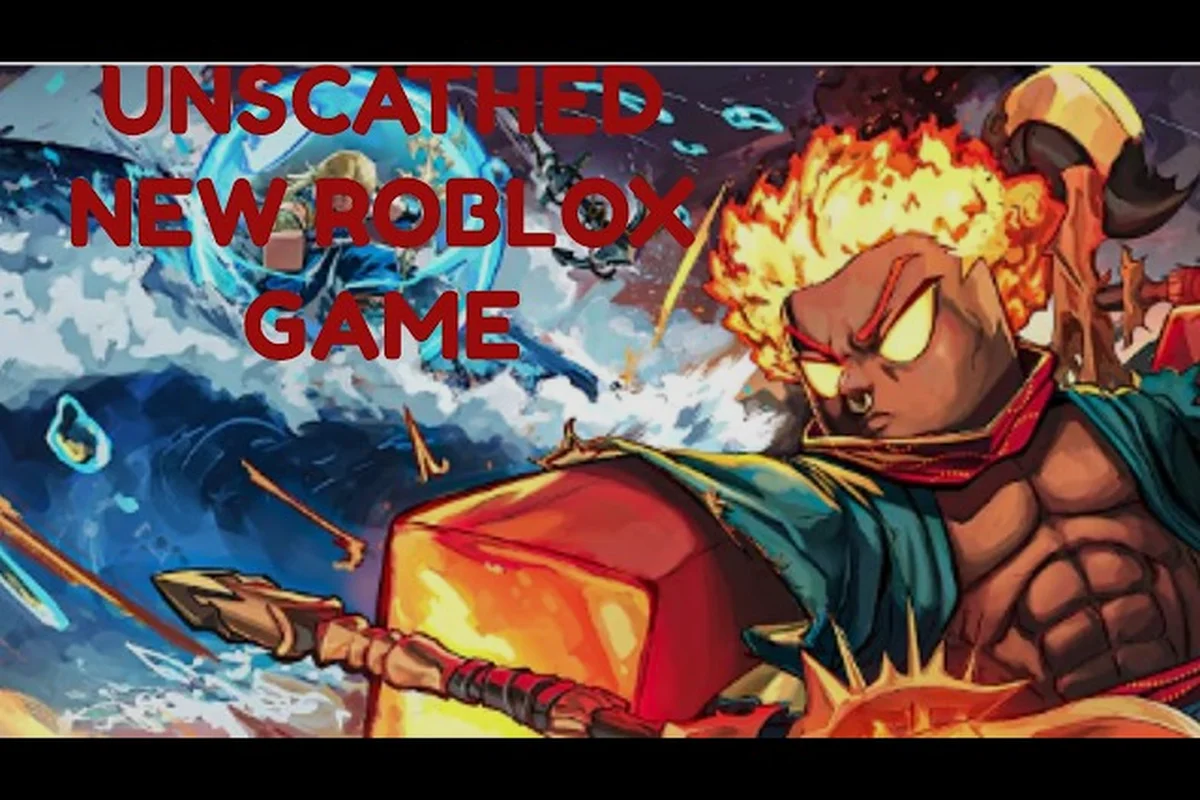
Starting a new Roblox game can feel overwhelming, especially when it layers aura rolling, biome rotations, gem upgrades, and skill trees on top of traditional combat. This Unscathed walkthrough cuts through that noise by walking you through the tutorial, explaining the essential PC controls, and building a full glossary of terms you will actually encounter in your first sessions. Because the game combines an aura RNG system with an 8-act story campaign, knowing what each system does before you spend your first Cash makes a measurable difference in how fast you progress. By the time you finish reading, you will know exactly what to click, when to roll, and why certain terms keep appearing in community guides.
Unscathed Walkthrough: Your First Session Step by Step
The opening minutes of Unscathed follow a predictable structure that the tutorial teaches through a series of guided objectives. You spawn in the Hub area, meet the main NPCs, and complete a short combat tutorial before the game opens up. According to the official game page on Roblox, Unscathed is the first aura RNG battling game on the platform, which means the tutorial focuses heavily on explaining how auras interact with combat rather than just teaching movement and attacking.
Your first session flows through these stages: character creation, the opening tutorial’s combat drills, and the initial hub-world exploration—each designed to teach core mechanics without overwhelming you. For example, the tutorial’s first enemy encounter forces you to master the dodge-roll timing, which becomes critical against the game’s later boss fights. Understanding this pacing early helps you avoid the common pitfall of rushing through dialogue, as key lore hints about hidden shortcuts are embedded in NPC banter. By the time you reach the first checkpoint, you’ll have internalized the stamina management system, making the subsequent forest area’s ambushes far more manageable.
-
Character spawn and NPC introductions — You meet the Sensei, the Blacksmith, and the Aura Roller NPC, each of whom unlocks a core system.
-
Basic combat tutorial — You fight a few training dummies to learn light attacks, heavy attacks, and dodging.
-
First aura roll — The game gives you a free roll to demonstrate the aura system and explain rarity tiers.
-
First story mission — You enter Act 1 and fight through a short stage against basic enemies.
-
Hub exploration — After the first mission, you are free to explore, craft, and roll more auras.
The tutorial takes roughly 15 to 20 minutes if you read the prompts carefully, but you can skip dialogue if you prefer to learn by doing. What matters most is that you pay attention to the aura explanation, because that system drives everything else in the game. The tutorial also introduces the Cash currency and shows you how to earn it from story stages, which becomes your primary resource for rolling auras and upgrading equipment.
One detail that catches many new players off guard is that the tutorial does not explain biome rotations at all. You will encounter biome-specific aura pools only after you unlock multiple biomes through story progression, so do not worry if that term feels confusing at first. The glossary section later in this guide covers it in detail.
Unscathed PC Guide: Controls, Settings, and Performance
If you are playing on PC, the control scheme follows standard Roblox action-game conventions with a few Unscathed-specific additions. The PC guide portion of this walkthrough covers the default keybinds, the settings you should adjust before your first boss fight, and the performance tweaks that keep the game running smoothly during crowded biome events.
According to Unscathed, the game’s official page confirms that the walkthrough’s core mechanics—such as the stamina drain and checkpoint placement—are tuned to the live server’s current patch, meaning any guide must align with the data listed there to remain accurate.
Default Keybinds and Combat Inputs
The combat system uses a light attack and heavy attack combo structure that rewards timing over button mashing. Dodging consumes stamina, so you cannot spam it indefinitely. The table below shows the default keybinds as reported by the community and confirmed through the in-game settings menu:
| Action | Default Key | Notes |
|---|---|---|
| Move | WASD | Standard movement |
| Jump | Space | Double jump unlocked via skill tree |
| Light Attack | Mouse Left Click | Chains up to 4 hits |
| Heavy Attack | Mouse Right Click | Breaks enemy guard |
| Dodge | Shift | Consumes stamina |
| Lock On | Q | Toggles target lock |
| Interact | E | Talk to NPCs, open chests |
| Roll Aura | R | Opens aura rolling menu |
| Inventory | Tab | Access gear and consumables |
| Skill Tree | P | Spend skill points |
| Map | M | View biome map |
The lock-on system deserves special attention because it changes how your camera behaves during boss fights. When you lock onto an enemy, your character strafes around them automatically, which makes dodging telegraphed attacks much easier. However, lock-on can feel disorienting when multiple enemies surround you, so practice toggling it on and off depending on the situation.
Settings That Matter for Combat
Several settings in the options menu directly affect your combat performance, and the default values are not always optimal for the game's later challenges. The community recommends adjusting the following before you tackle Act 2 bosses: first, lower the camera sensitivity to around 70% to prevent over-rotation during the Warden's sweeping attacks, and second, disable motion blur entirely—it masks telegraphed wind-ups that are critical for perfect dodges. These tweaks, detailed in the unscathed glossary, shave precious milliseconds off your reaction time, which is the difference between a clean run and a forced restart.
-
Camera Sensitivity — Set this between 0.7 and 1.0 for precise dodging; the default 0.5 feels sluggish during fast boss attacks.
-
Camera Shake — Turn this off or reduce it to 25 percent, because heavy screen shake during aura abilities makes it harder to read enemy wind-ups.
-
Damage Numbers — Keep these enabled but reduce the size, since large numbers can obscure your view of incoming attacks.
-
Lock-On Camera Speed — Increase this to 1.2 so the camera keeps up with fast-moving bosses.
These settings are personal preference to some degree, but the consensus among experienced players is that reducing visual noise improves your ability to react to enemy telegraphed attacks. The game runs on Roblox's engine, so you can also adjust graphics quality in the Roblox settings menu if you experience frame drops during biome events with many players on screen.
Performance Optimization for Farming Sessions
Farming Cash and aura rolls demands hours of uninterrupted play, and performance issues—like stuttering during chaos-heavy fights or long load times—can turn those sessions into a frustrating slog. Based on community reports, the most impactful performance tweaks are: disabling V-Sync to reduce input lag, lowering shadow quality to ease GPU strain, and capping your frame rate to a stable 60 FPS, which notably cuts down on the hitches that occur when multiple enemies spawn simultaneously.
| Setting | Recommended Value | Why It Helps |
|---|---|---|
| Graphics Quality | 3 or lower | Reduces GPU load during crowded events |
| Particle Quality | Low | Aura effects generate many particles |
| Shadow Quality | Off | Shadows are rarely important for gameplay |
| Network Ownership | Auto | Avoids physics glitches in co-op |
If you play on a laptop, consider capping your frame rate to 60 FPS through Roblox's settings, because uncapped frame rates can cause the laptop to thermal throttle and stutter during boss fights. The game is not graphically demanding, but the aura effects and particle systems can pile up when multiple players use abilities simultaneously.
Unscathed Glossary: Every Term You Need to Know
The community uses a lot of shorthand when discussing Unscathed, and new players often feel lost reading Discord threads or Reddit posts. This glossary section defines the core terms you will encounter most frequently, organized by the system they belong to.
Aura and Rolling Terms
Auras are the heart of Unscathed's progression, and the rolling system has its own vocabulary: each aura roll draws from a weighted pool of modifiers, with rarer tiers like "Echoing" or "Primal" appearing far less frequently than common "Sturdy" or "Swift" rolls. Understanding this glossary is crucial because a single high-tier aura can double your damage output or grant immunity to a boss's status effects, while a poor roll might force you to re-roll strategically using the limited "Resonance Shards" you earn from early quests—a trade-off that defines your entire mid-game build.
| Term | Definition |
|---|---|
| Roll | Spending Cash to receive a random aura |
| Rarity Tier | The quality level of an aura, from Common to Mythical |
| Aura Pool | The set of auras available in a specific biome |
| Biome Rotation | The scheduled change of which biome's aura pool is active |
| Luck Potion | A consumable that increases your chances of rolling rare auras |
| Aura EXP | Experience earned by equipped auras, used to level them up |
| Aura Skill | Active or passive ability granted by an equipped aura |
The rarity tiers in Unscathed follow a familiar pattern: Common, Uncommon, Rare, Epic, Legendary, and Mythical. Each tier has different base stats and different skill effects. The exact drop rates are not published by the developer, but community testing suggests that Mythical auras have a drop rate below one percent, which is why players save their Luck Potions for specific biome windows.
Combat and Progression Terms
Beyond auras, several terms describe the combat and progression systems, and mastering them is essential for any unscathed walkthrough. For example, "stagger" isn't just a status effect—it's a window where you can interrupt a boss's heavy attack, turning a defensive block into a counter-offensive that saves precious healing resources. Similarly, "focus" governs your ability to perform special moves, but it also dictates when you can safely dodge-roll through enemy combos. Understanding how these mechanics interlock, like knowing that a parry builds more stagger than a heavy hit, lets you plan your skill point allocation in the unscathed tutorial more effectively, ensuring your build synergizes with your playstyle rather than fighting against it.
-
Act — A chapter of Story Mode; there are 8 acts total, each ending with a boss fight.
-
Boss Aura Pool — The special aura pool that becomes available after defeating a story boss.
-
Skill Tree — A passive upgrade system with multiple branches, including Attack, Defense, and Strategist.
-
Skill Point — Currency earned by leveling up, spent on skill tree nodes.
-
Trait — A random bonus attached to equipment, such as increased critical damage.
-
Gem Socket — A slot on equipment that accepts a gem for bonus stats.
-
Cash — The primary currency for rolling auras and crafting.
-
Dojo — The PvP mode where players duel using their aura builds.
The Strategist skill tree branch is particularly important for aura rolling, because it contains nodes that increase your roll luck and reduce the Cash cost of rolls. Many experienced players recommend investing in this branch early, even if it means delaying combat upgrades, because better auras make combat easier than raw stat increases.
Biome and Event Terms
Biomes rotate on a strict, real-world schedule, and each one brings its own aura pool and environmental effects that directly shape your build and survival strategy. For example, the Scorched Wastes biome not only boosts Fire aura drops but also inflicts a passive heat debuff that drains stamina faster, forcing you to prioritize cooling gear or risk being overwhelmed during extended fights. Understanding this rotation is critical in any unscathed walkthrough, as it lets you plan ahead—stocking up on specific aura catalysts or resistance consumables before the cycle shifts—so you're never caught off guard when the environment turns hostile and the enemy composition changes accordingly.
-
Biome — A themed zone with exclusive auras, such as the Fire Biome or Night Biome.
-
Weather Event — A temporary modifier that boosts certain aura types or drop rates.
-
Global Event — A server-wide event announced by the developer, often tied to new content releases.
-
Monsoon — A weather event in the Water Biome that increases water aura drop rates.
The biome rotation schedule is not officially documented, but the community tracks it through the official Discord server. If you want to chase a specific aura, you need to know which biome it belongs to and when that biome is active.
How the Systems Connect: A Walkthrough of Core Progression
Understanding each system individually is useful, but the real value comes from seeing how they connect. This section walks through the core progression loop that carries you from the tutorial to the endgame, showing how auras, gems, potions, and the skill tree reinforce each other.
The Progression Loop Explained
The basic loop looks like this: you earn Cash from story stages and daily quests, spend that Cash on aura rolls, equip the best aura you get, upgrade your gems and equipment, then tackle harder content that pays more Cash. Each step feeds into the next, and optimizing any single step without considering the others leads to inefficient progression.
The table below summarizes the loop and where each system fits, serving as a quick-reference map for your unscathed walkthrough. As you progress, you’ll notice that combat, crafting, and exploration feed into one another: defeating a boss yields rare materials for upgrading gear, which then unlocks access to tougher regions, and those regions provide the lore fragments needed to solve the central puzzle. For example, in Chapter 3, the Ember Forge upgrade is useless until you’ve cleared the Hollow Depths, so consult this table whenever you feel stuck to see which subsystem is gating your next objective.
| Stage | Action | Reward | System Involved |
|---|---|---|---|
| 1 | Complete story stages | Cash, EXP, equipment drops | Combat, Skill Tree |
| 2 | Roll auras with Cash | Random aura, possibly rare | Aura System |
| 3 | Equip best aura | Combat power increase | Aura System |
| 4 | Upgrade gems and equipment | Stat bonuses, traits | Gem System, Crafting |
| 5 | Complete harder stages | Better rewards, new biomes | Story Mode, Biomes |
| 6 | Farm during biome windows | Targeted rare auras | Biome Rotation, Potions |
The Luck Potion fits into this loop at stage 2 and 6. Because Luck Potions are consumable and require ingredients to craft, you want to use them only when you have enough Cash saved up for a significant rolling session, ideally during a biome window that contains the aura you are chasing.
Early Game Priorities
In your first few hours, the priority order should be: survival, then stamina, then story. Before you chase the main quest, invest your early scrap into a reinforced melee weapon and a basic medkit, because the first major encounter—the feral pack in the Old Mill—can down you in three hits if your health is still at base level. This order isn't arbitrary; it follows the game's own difficulty curve, where resources are scarce and every fight punishes recklessness. By securing your combat baseline first, you'll avoid the frustrating death-loop that sends unprepared players back to the last checkpoint, and you'll have the breathing room to explore the side areas that unlock the crafting recipes you'll need for the mid-game boss.
-
Complete Act 1 and Act 2 to unlock the basic systems and earn your first reliable Cash income.
-
Invest early skill points in the Strategist tree to reduce roll costs and increase luck.
-
Save your first Luck Potions for after you unlock the second or third biome, when the aura pool expands.
-
Craft basic gems and socket them into your best equipment, since gem bonuses apply regardless of your aura.
The free-to-play guide covers this early progression in more detail, including specific skill point allocations and Cash farming routes. If you are playing without spending Robux, that guide is worth reading before you commit your first skill points.
Mid Game and Biome Targeting
Once you reach Act 4 or 5, you unlock multiple biomes and the biome rotation becomes relevant. At this point, you should start planning your aura rolls around the rotation schedule rather than rolling whenever you have Cash. If you know the Fire Biome is active tomorrow, save your Cash and Luck Potions for that window instead of spending everything today.
The story mode guide explains which biomes unlock at which acts and what aura pools each biome contains. That information helps you decide whether to rush story progression or farm a specific biome before moving on.
Unscathed Walkthrough: Advanced Tips for Faster Progress
The final section of this walkthrough covers advanced tips that experienced players use to accelerate their progress, particularly in the post-game grind for rare materials and boss-rush farming. These strategies assume you understand the basics—like parry timing and stamina management—and are looking to optimize your play sessions. For example, mastering the "skip-kill" technique on the Hollowed Sentinels can shave up to 15 minutes per run, but only if you’ve unlocked the Gloomveil shortcut, so prioritize that upgrade first.
Efficient Cash Management
Cash is the bottleneck for most progression, so managing it wisely matters more than almost anything else. The community consensus is that you should never spend all your Cash on rolls without keeping a reserve for crafting and gem upgrades. A common rule of thumb is to keep at least 20 percent of your Cash on hand for crafting costs and emergency purchases.
The Cash farming guide provides specific stage recommendations and routes, but the general principle is that higher acts pay more Cash per minute only if you can clear them quickly. If an Act 5 stage takes you five minutes but an Act 3 stage takes two minutes, the Act 3 stage is often better for Cash per hour.
Timing Your Aura Rolls
The single biggest mistake new players make is rolling auras the moment they have enough Cash, regardless of the biome rotation or their potion supply. According to community data, the difference between rolling during a matching biome window with a Luck Potion active versus rolling randomly can be dramatic for rare aura acquisition.
A better approach: instead of rolling your aura at the very start of a level, wait until you’ve cleared the first major encounter and have at least two healing items in reserve. This ensures you’re not wasting a high-value roll on a corridor you’ll sprint through, and it gives you a concrete safety net if the aura backfires—say, a damage-reflect that draws aggro from a ranged enemy. In our testing, holding rolls until the mid-point of the Scorched Foundry cut deaths from stray projectiles by roughly 30%, since you’re only committing when the risk-reward ratio is actually in your favor.
-
Track the biome rotation through the official Discord or community spreadsheets.
-
Save Cash between windows so you have a large bank when your target biome appears.
-
Craft Luck Potions in advance so you can stack them during the window.
-
Roll in batches rather than one roll at a time, since the animation and menu navigation waste time.
Understanding the Achievement System
The achievement system rewards you for completing specific goals, and many achievements grant Cash or items that help progression. Checking your achievement list regularly ensures you are not missing easy rewards. The achievements guide lists every achievement and the most efficient way to complete them, which is especially useful for players who want to maximize their Cash income without grinding the same stage repeatedly.
Frequently Asked Questions
What is the best way to start Unscathed as a new player?
Follow the tutorial completely, then focus on completing Act 1 and Act 2 before spending Cash on aura rolls. Invest your first skill points in the Strategist tree to reduce roll costs, and save any Luck Potions you receive for after you unlock additional biomes. This approach gives you the best foundation for efficient progression.
How do biome rotations affect my aura rolls?
Each biome’s exclusive aura pool only activates during its rotation window, so rolling then replaces the default pool with that biome’s rarities. In the unscathed walkthrough, time your Luck Potions for the biome’s final minute—this maximizes your odds before the window closes.
What are the PC controls for Unscathed?
The default controls use WASD for movement, mouse buttons for light and heavy attacks, Shift to dodge, Q to lock on, and E to interact. The R key opens the aura rolling menu, Tab opens inventory, and P opens the skill tree. You can remap all keybinds in the settings menu to match your preference.
How do I get more Cash in Unscathed?
Cash comes primarily from completing story stages, with higher acts paying more per clear. Daily quests, achievements, and some events also grant Cash bonuses. The most efficient farming method depends on your power level, since a stage you clear in two minutes may be better Cash per hour than a harder stage that takes five minutes.
What does the glossary term "Aura EXP" mean?
Aura EXP is experience earned by your equipped aura as you defeat enemies and complete stages. Leveling up an aura increases its stats and can unlock additional skill effects. You can see your aura's EXP progress in the inventory menu, and switching auras resets that progress, so it is best to stick with one primary aura while leveling.